Add or Edit a Miscellaneous Billing Invoice
The Miscellaneous Billing module is used for charging customers for goods and services provided by your municipality. It is designed for use by a number of departments and can generate one-time (Standard) or repeat/recurring (Template) bills.
The Miscellaneous Billing Invoice page, allows authorized users to enter and maintain specific customer invoices. To create or edit a customer invoice, follow the steps below:
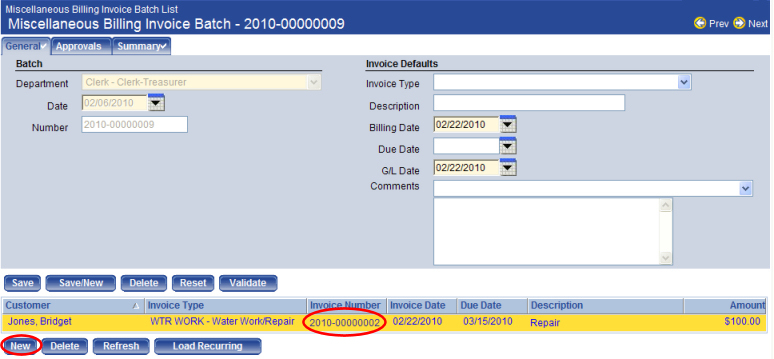
- Go to Financial Management > Miscellaneous Billing > Billing Invoice Batches. The Miscellaneous Billing Invoice Batch List page opens.
- Create a new batch or select an existing batch to open the Miscellaneous Billing Invoice Batch page. See Add or Edit an Invoice Batch for more information.
- Click New to create a new invoice or click the Invoice Number hyperlink in the invoice list to edit an existing invoice.
Invoice
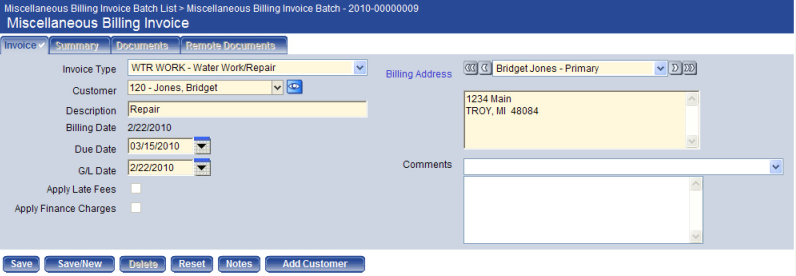
- Select the Invoice Type associated with the invoice. It is disabled in EDIT mode. Only invoice types to which you have authority are displayed.
- Select or enter the Customer associated with the invoice being created. The customer must have an active status to be selected. This field is disabled in EDIT mode. Clicking the Search (
 ) icon opens a pop-up which enables you to search for the customer record you want to display.
 - Enter a textual Description for the invoice. The maximum character length is 64; the minimum is 1. There are no character restrictions.
- The Billing Date displays the date the invoice was generated; it is VIEW-ONLY. The default is the invoice batch header billing date.
- In Due Date, select or enter the date the invoice is due. The default is the invoice batch header due date.
- In G/L Date, select or enter the date on which the invoice is to be recorded in the general ledger. The default is the invoice batch header G/L date. The date must be less than the date entered in the Maximum Future post date field on the Journal Processing tab on the Company Suite Settings page.
- Select the Apply Late Fees check box if late fees are to be applied to the invoice.
- Select the Apply Finance Charges check box if finance charges are to be applied to the invoice.
- Select the Billing Address to use for the invoice. The default is the primary address from the customer contact. The drop-down portion of the Billing Address field lists all addresses defined for the customer chosen. On the left of the field is a Move Previous
 symbol; click the symbol to move the display to the previous billing address record in the list. On the right of the field is a Move Next
  symbol; click the symbol to move the display to the next billing address record in the list.
Click the Move First
symbol; click the symbol to move the display to the next billing address record in the list.
Click the Move First  symbol to display the first billing address listed. Click the Move Last
  symbol to display the last billing address listed.
 - The Email Address field is for informational purposes only. The Email Address label, however, is a hyperlink. Clicking the label opens the applicable Miscellaneous Billing Customer page where the email address can be modified if necessary.
- Select or enter any comments associated with the invoice. It may contain 256 characters.
- Click Save or Save/New to save and create a new invoice.

| Field | Description |
|---|---|
| Billing Code | Billing code used for the line item on the invoice. If the invoice item is from Inventory Billing, this column displays the inventory item instead of the billing code. |
| Quantity | Quantity of the invoice line item. The acceptable range is .0001 through 999,999,999.9999. Once a quantity has been entered, the Quantity, Unit of Measure, and Price per Unit on the page and will be used to calculate the Total Price. |
| Unit of Measure | Unit of measure on which the price per unit is based for the line item. |
| Override Price per Unit | Per unit charge for the invoice line item. |
| Price per Unit | Displays the ‘Step Rate’ label to indicate that the billing code price is based on a predefined step rate. The word Override displays below the Price per Unit column heading if the row’s Override Price per Unit contains a price. |
| Detail | Clicking |
| Insert | Clicking |
Invoice Billing Detail
| Field | Description |
|---|---|
| Quantity | Total number of items to apply to the selected billing code on the invoice. The acceptable range is -.0001 through -9,999,999.9999 and .0001 through 9,999,999.9999. The default is the value entered in the Quantity field for the row in the Billing Code list on the Invoice page. Zero is an invalid entry. |
| Unit of Measure | The unit of measure associated with the items ordered for the selected billing code on the invoice. It is enabled if Quantity is not equal to 0. |
| Comments | The free-form comments associated with the invoice billing detail. The maximum character length is 256. |
| G/L Account | Select a general ledger account associated with the invoice. |
| Rate per Unit | The rate to override the default rate of the items ordered. The acceptable range is –.0001 through 9,999,999.9999 and .0001 through 9,999,999.9999. |
Click Notes to add notes for the miscellaneous billing invoice. This tab makes use of the Document Viewer feature. This button is visible only if you have rights to the Miscellaneous Billing Invoice Notes security component. It is disabled if you do not have Change rights to the Miscellaneous Billing - Invoice security component.
When adding a new invoice, click Add Customer to add a new customer prior to starting the invoice entry. It is disabled if you do not have Change rights to the Miscellaneous Billing - Invoice security component. See Add or Edit a Customer Record for more information on using this page.
The Summary tab allows authorized users to view summarized information such as gross billed, billing adjustments, and payments.
The Documents tab allows you to view and track documents associated with an invoice on your system. Documents may include Microsoft Word® text files, digitized photographs, or even video clips. Remote Documents may also be added. See Document Viewer for more information.
To delete an invoice batch click Delete.
The Delete button is hidden or disabled if you do not have the appropriate security permissions. If you are authorized, when you click Delete you are prompted to confirm the deletion.
See Also
Miscellaneous Billing Overview